What’s New in Evergine Studio
In this release we have made major improvements to the user experience of Evergine Studio. In this article we go through the main changes, which we hope you will enjoy and which should make your daily work on Evergine Studio projects a little easier.
Simulate behaviors and physics from Evergine Studio
Evergine Studio now has a Play Mode that simulates behaviors and physics inside the editor. It was one of the most requested features. Until now, to see how a scene behaved you had to build and launch the application, then go back to the editor to fix whatever was wrong. Now you can set up complex physics scenes, or check how your behaviors are implemented and how they behave, right from Evergine Studio with a single click.
The top bar of the scene viewport has three new buttons:
- Play (Ctrl+P) runs the scene the way your application would: behaviors update, physics simulates, particles are emitted and the scene is seen through its own cameras. While the scene runs, the button becomes Pause (Ctrl+Shift+P), which freezes the simulation but keeps rendering, so you can still move the camera around.
- Step (Ctrl+Alt+P) advances the paused simulation by a single frame and pauses it again. It is very useful to understand collisions, constraints or animations that happen too fast to follow at normal speed.
- Stop ends the simulation and goes back to editing.
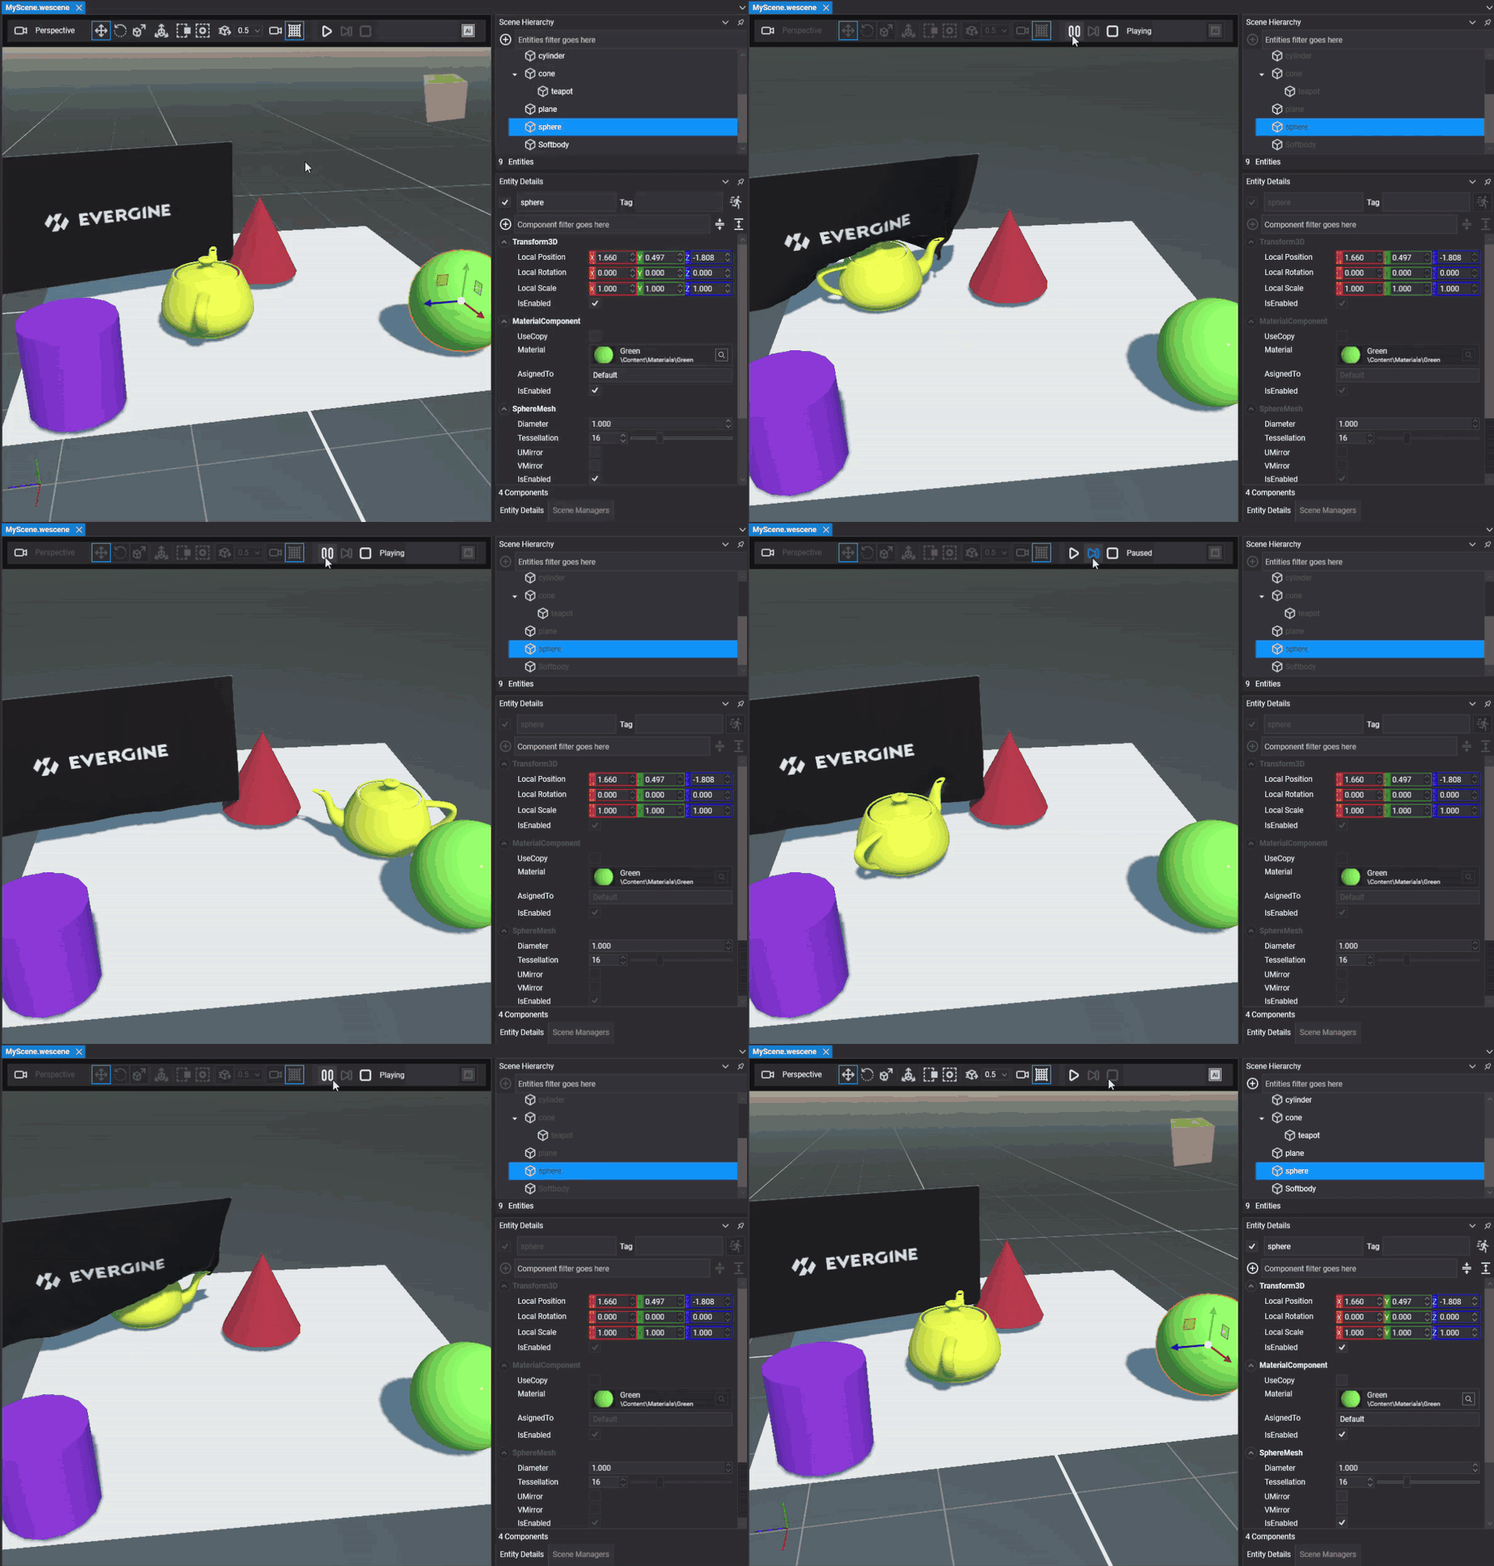
Play Mode runs a copy of the scene built from its asset, so the scene you are editing is never modified: when you press Stop you get it back exactly as it was before you pressed Play. Keep in mind that it runs the scene asset, not your whole application: code you add to your Scene class (for example in MyScene.cs) or to your Application class does not run. If the scene has no active camera, the viewport shows a notice instead of a black screen.
To make room for the new buttons we have also reorganized the scene toolbar. It used to show the three snap options (translation, rotation and scale) at once. Now it only shows the one for the selected transform tool.
Previous release:

New release:

New manipulators
We have also rebuilt all the manipulators that move, rotate and scale entities in the scene viewport. They now use the implementation of the ImGuizmo library, the same one many engines and tools use. The new manipulators respond better and are easier to grab, and they bring improvements such as showing the distance covered during a translation:
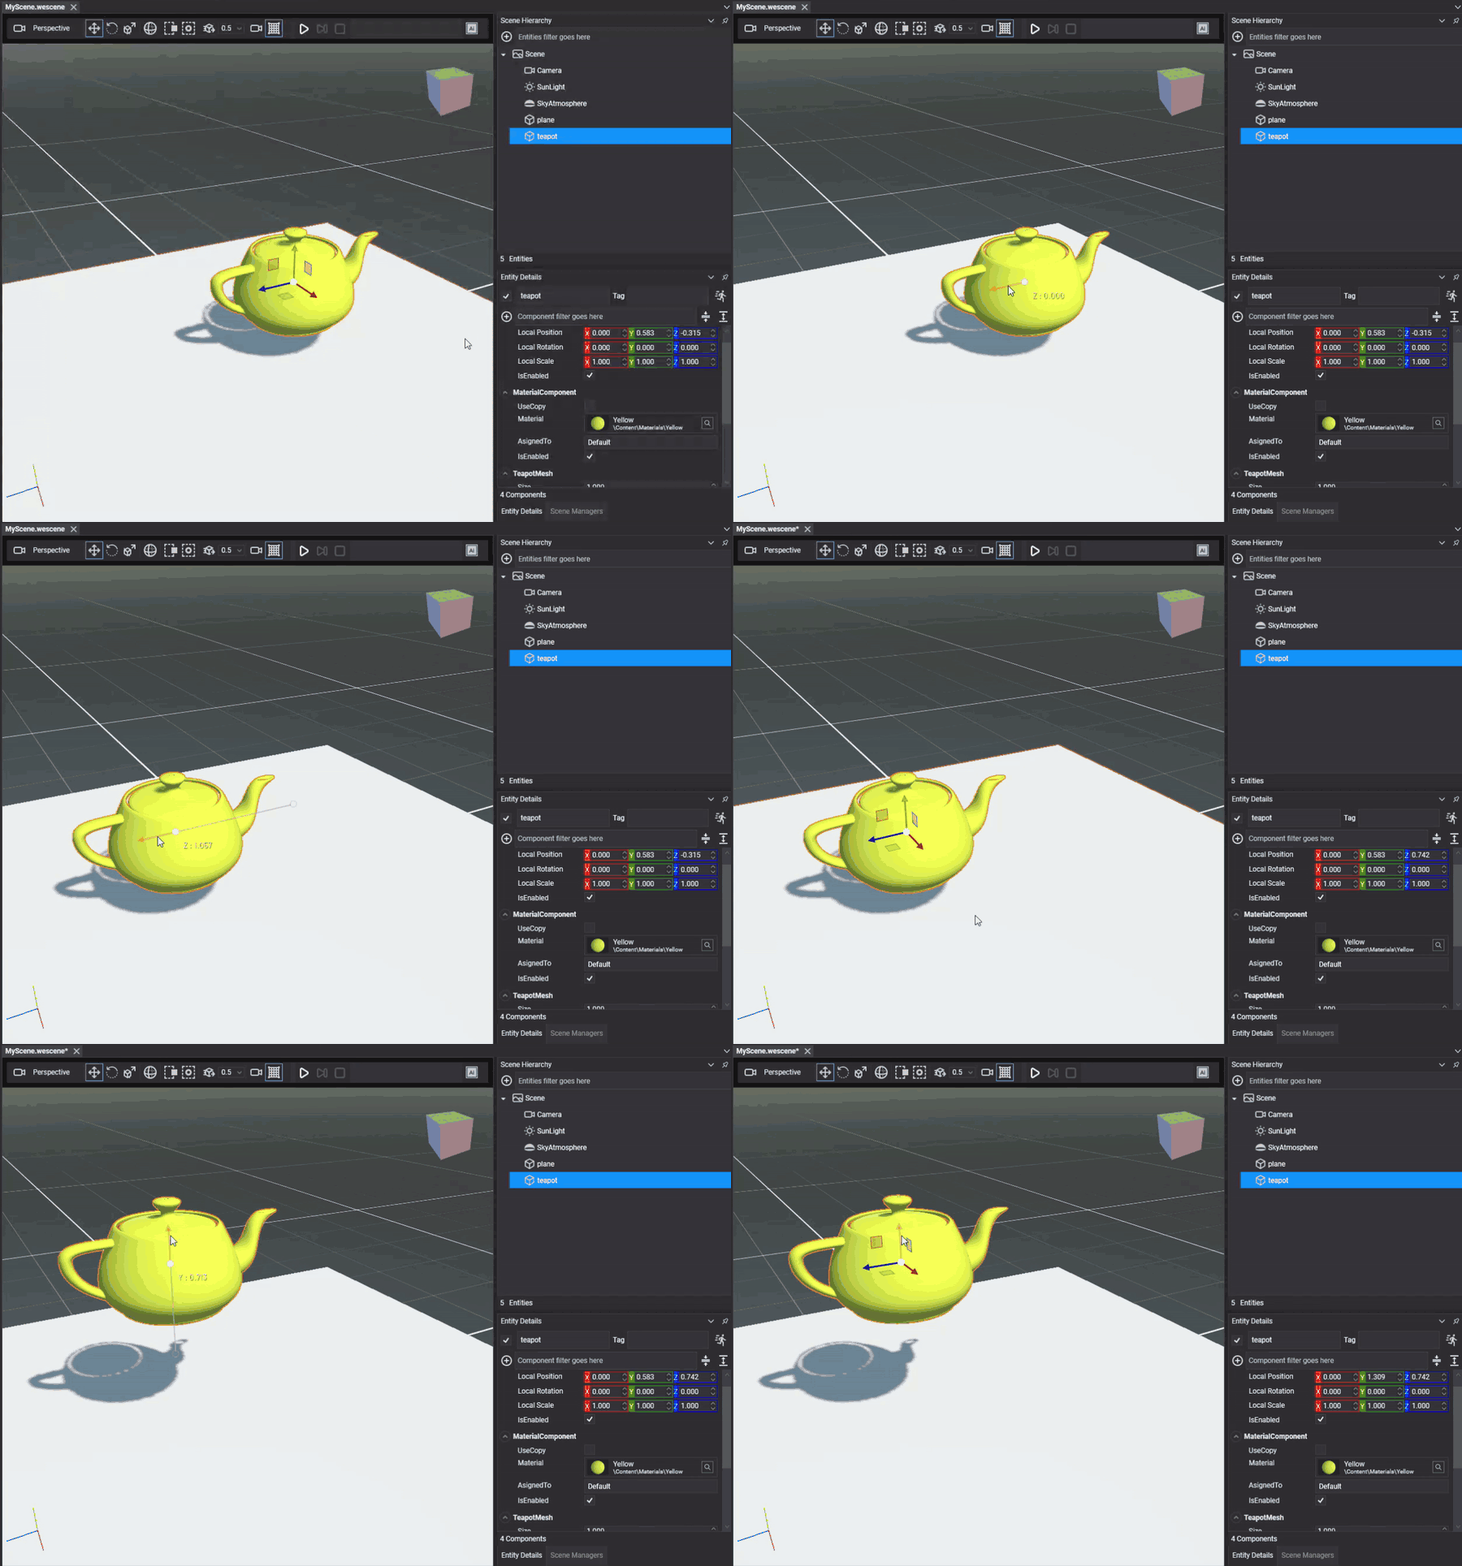
Or the degrees turned during a rotation:
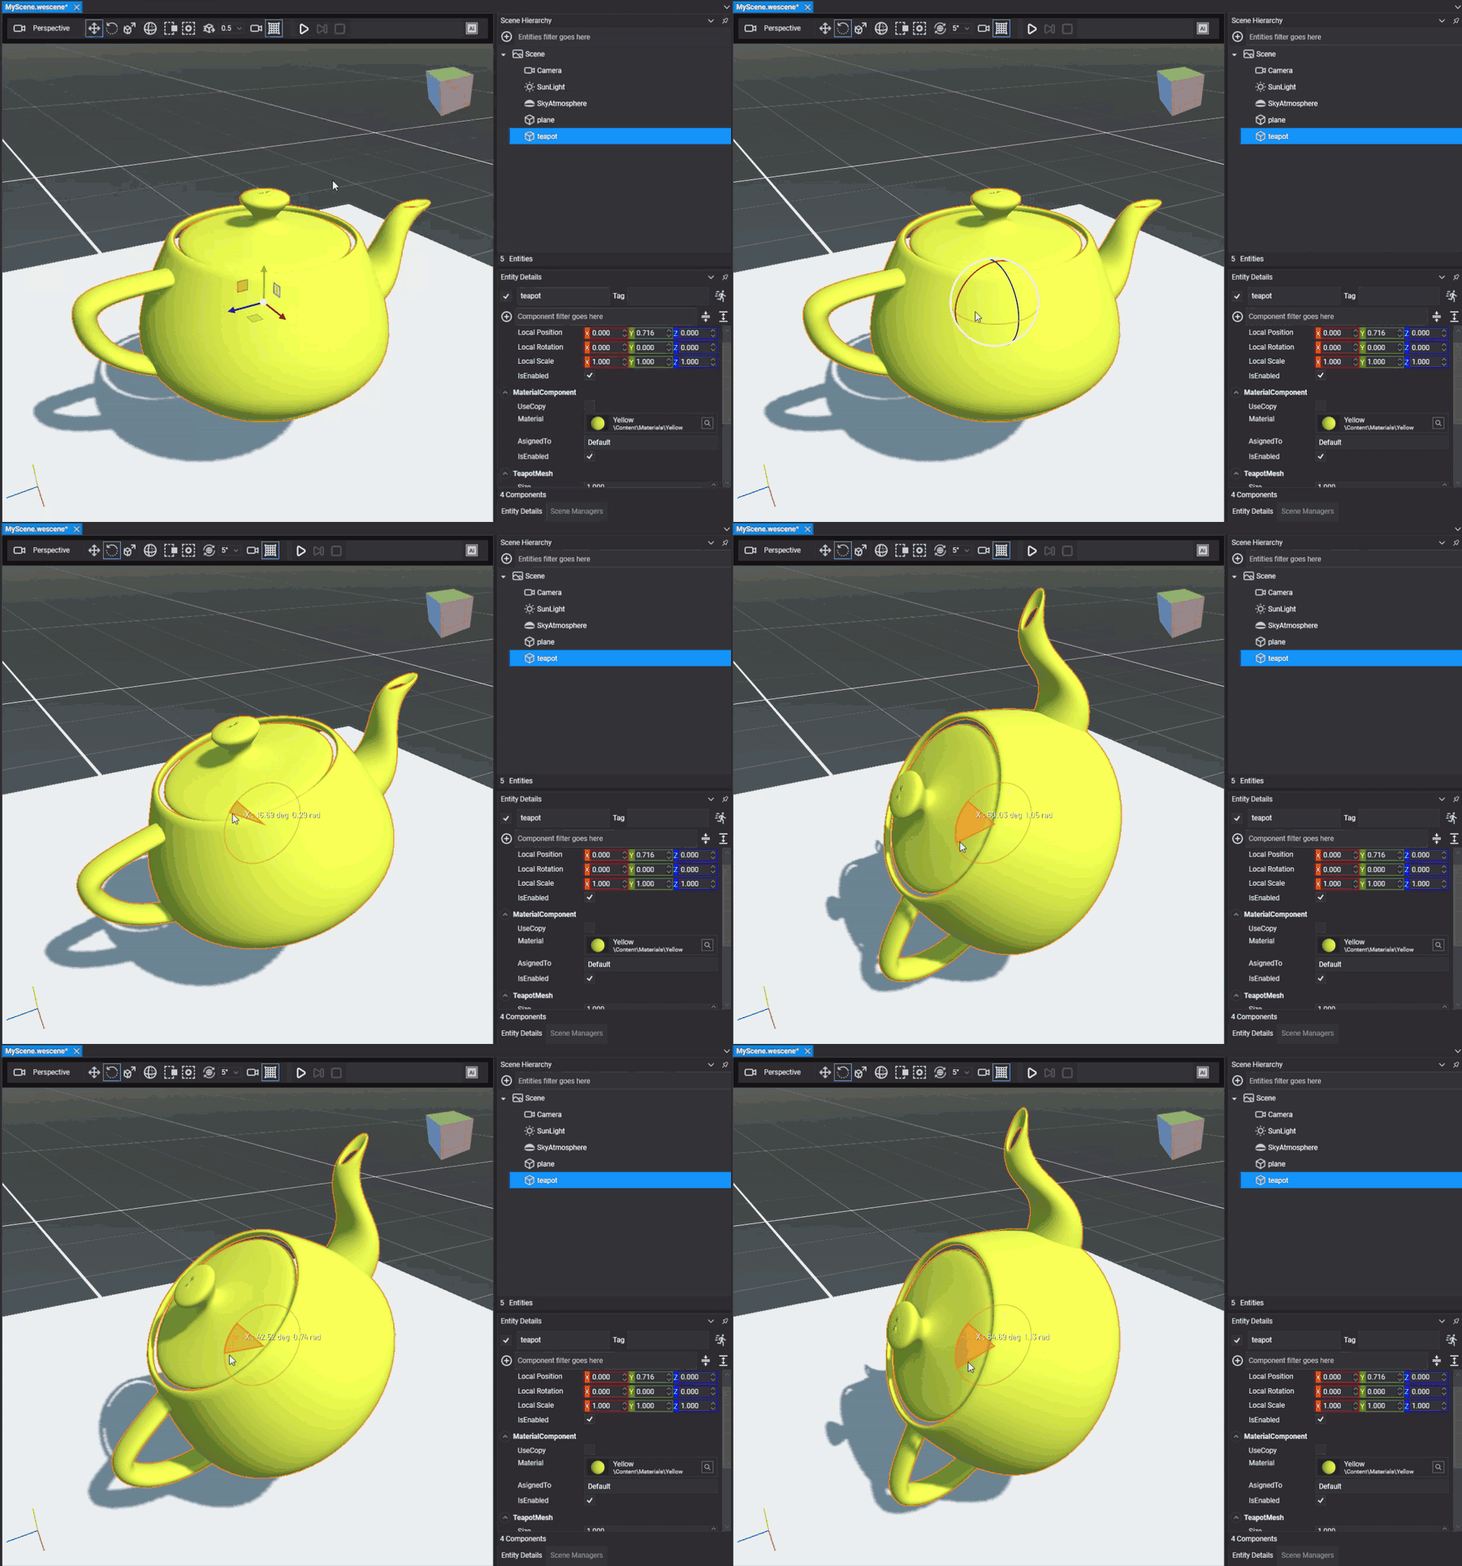
Snapping, the pivot and multi-selection still work, so you can transform several entities at once.
Along with the manipulators comes the View Cube, also from ImGuizmo. It shows the camera orientation in a corner of the viewport, and clicking one of its faces switches to the front, top, side or any other view. Setting up the view to edit a scene is now much faster.
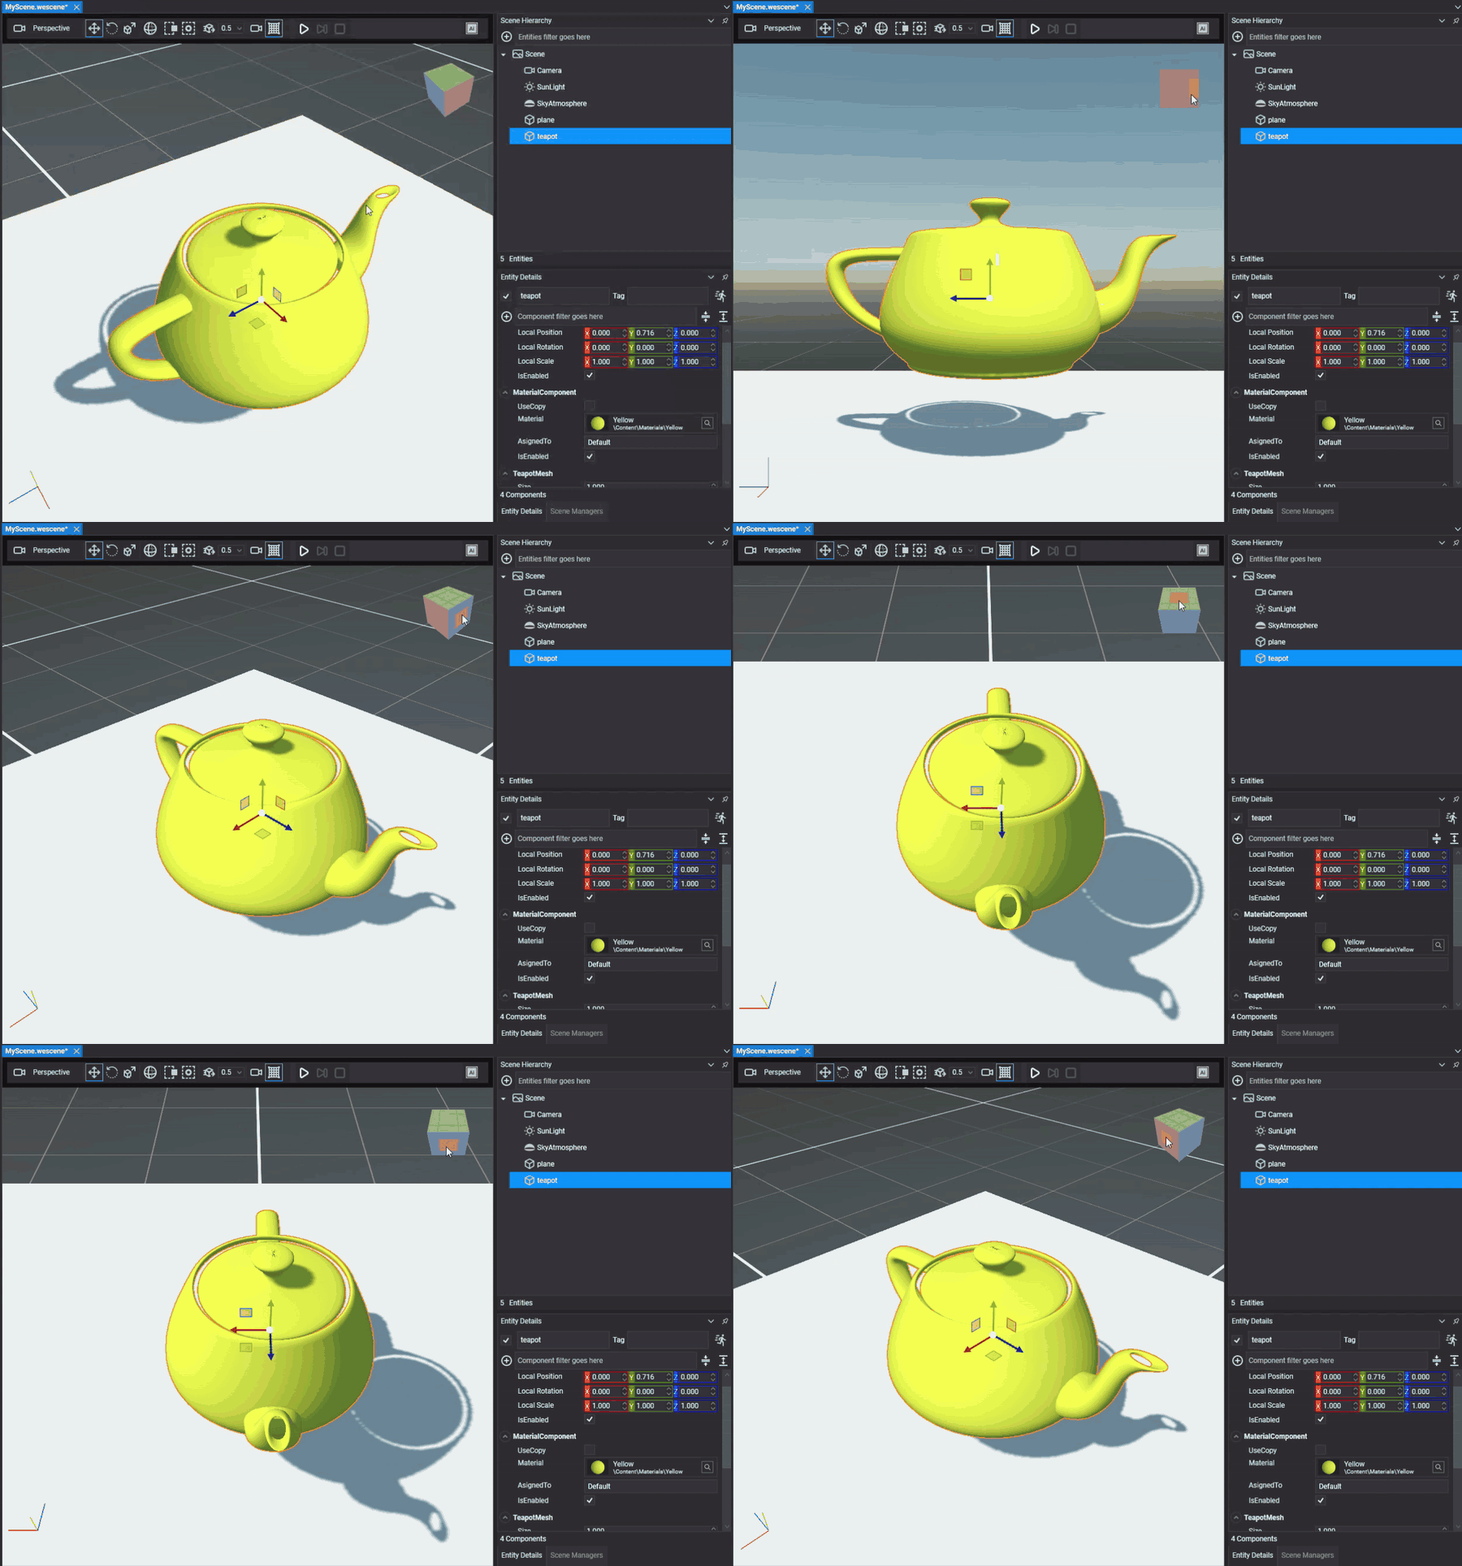
Pixel perfect selection
Another big improvement to the Evergine Studio viewport is the selection system. Until now, the editor picked entities with simplified volumes (boxes and spheres fitted to each model), so clicking the empty space around an object could select that object, and selecting a small object behind a large one was hard. Selection is now pixel perfect: you select exactly what you see under the cursor, which is much more precise when working with complex scenes. On top of that, the selected entity is drawn with an orange outline around its silhouette, so you can tell at a glance which one it is.
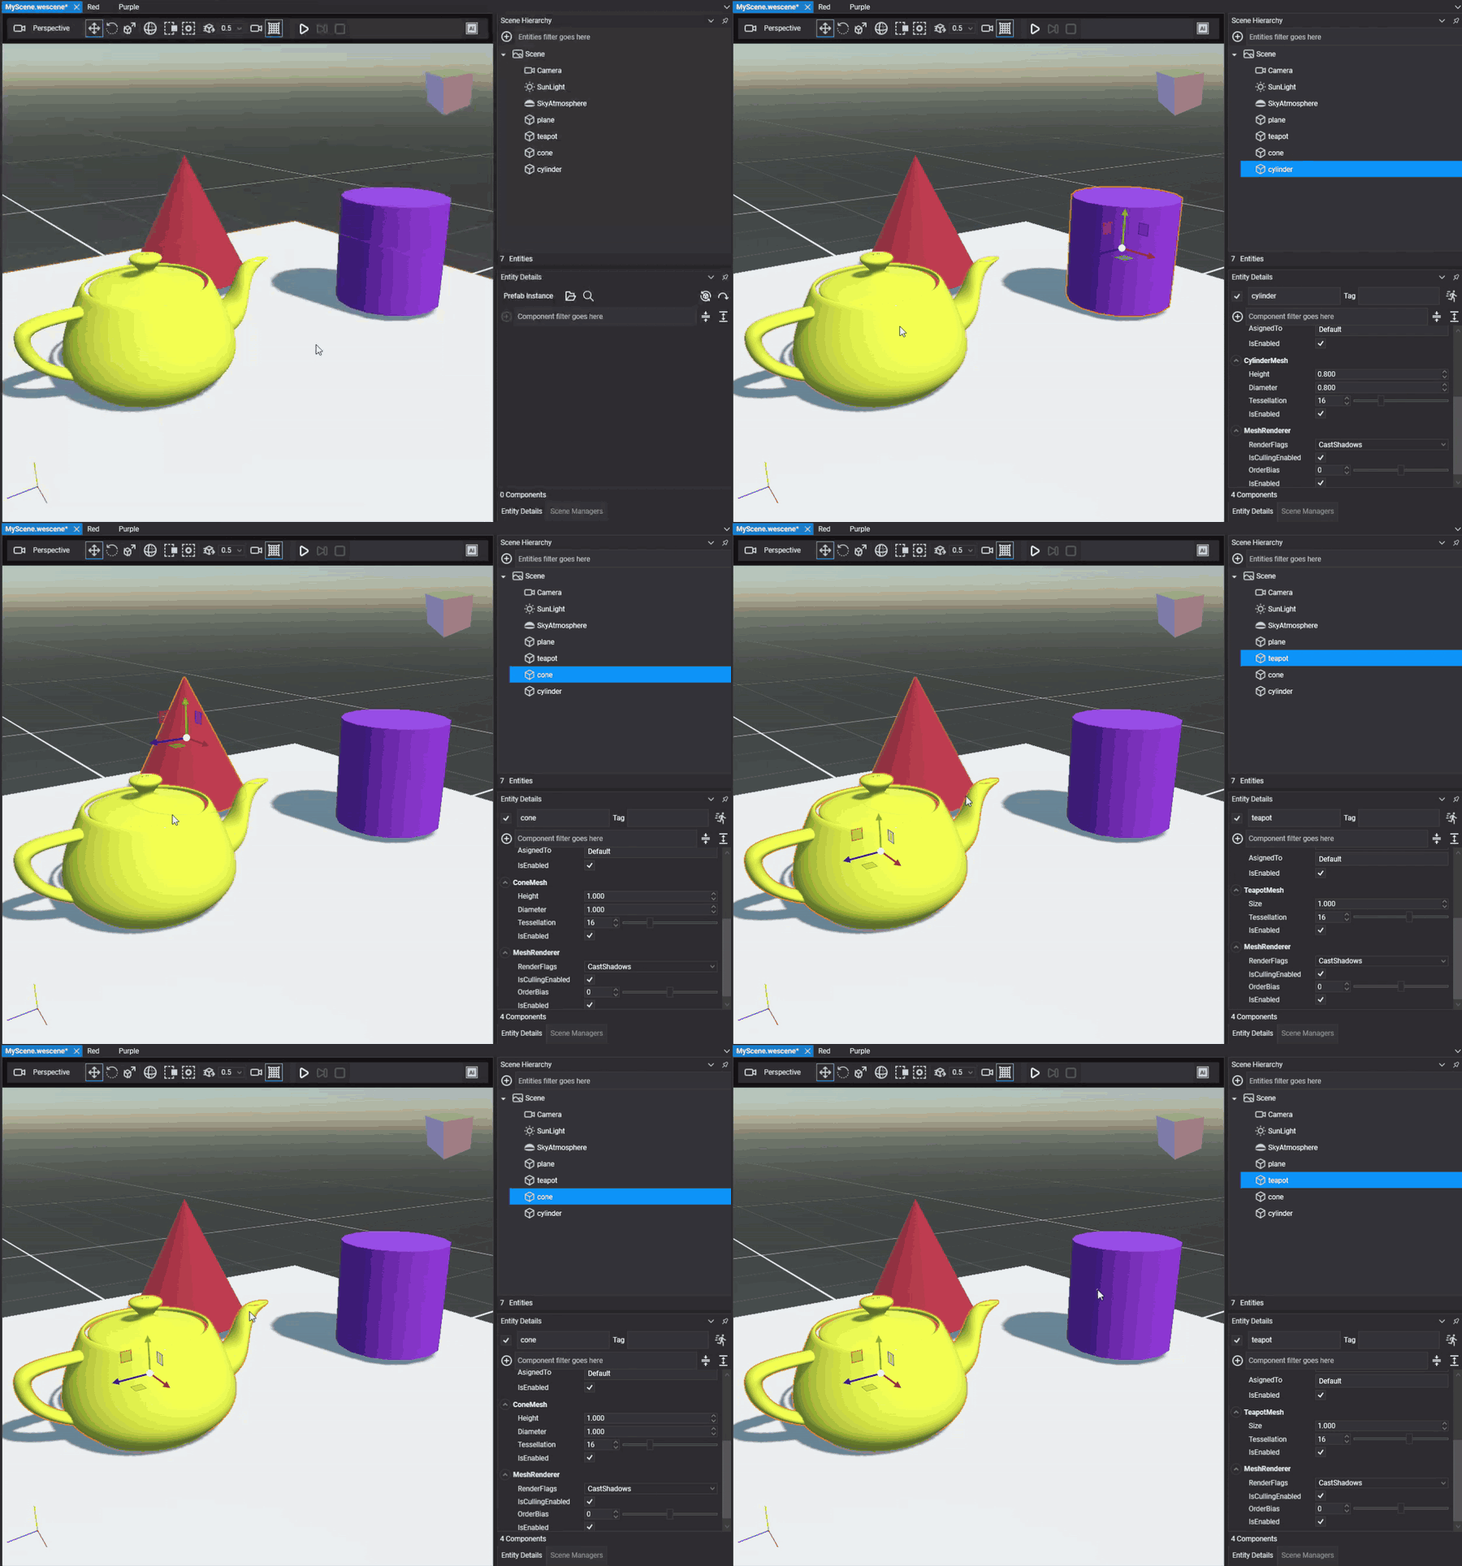
When you select the root of an entity hierarchy, its children and grandchildren are drawn with a blue outline. That tells you they are not the selected entity, but that the transforms you apply to it will move them too.
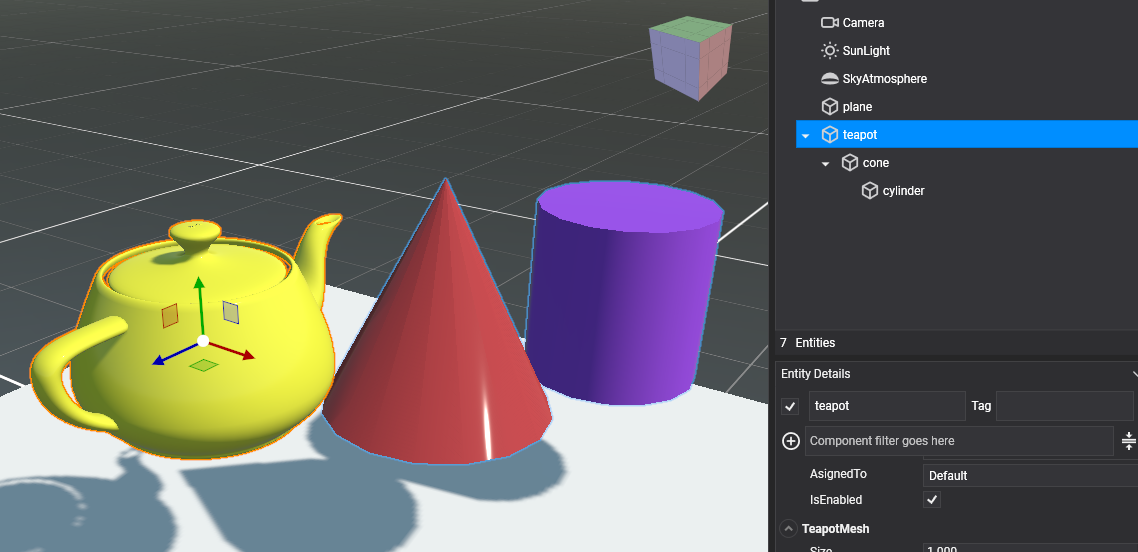
A few more details make selection more comfortable:
- The entity under the cursor is highlighted on hover, so you know what you are about to select before you click.
- The parts of the selection hidden behind other objects are still drawn with less opacity, so you never lose sight of a hidden object.
- Clicks have a tolerance of a few pixels, so thin objects such as lines are easy to select too.
- Editor icons (lights, cameras, particles…) are selected by clicking them, and rectangle selection uses the same system, so it only selects what is really visible.
- In a hierarchy or a prefab, the first click selects the root and the next one selects the exact entity under the cursor.
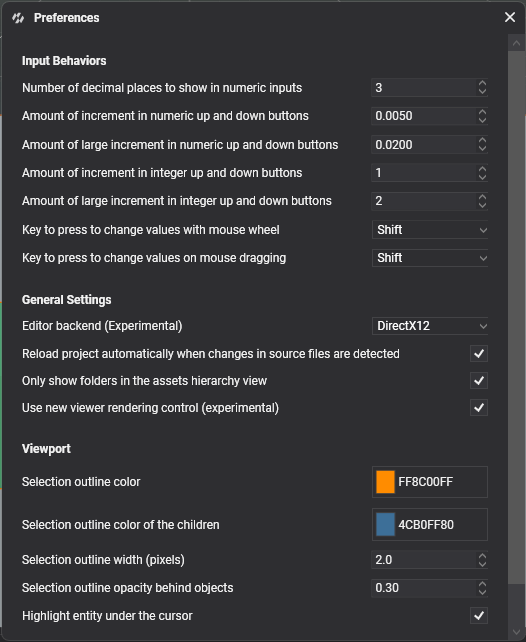
The outline colors, its width, the opacity of hidden parts and the hover highlight are set in Preferences > Viewport.
Manage services from Project Settings
In Evergine, services (classes that derive from Service or UpdatableService) are the application-level counterpart of a component or a behavior: you use them when you need global logic or state that does not depend on the scenes in your project. Until now you had to register them in code in your Application class. In this release you can manage services from the Project Settings panel of Evergine Studio, without writing any code.
In the new Services section you can add the services of your project, remove them and configure their properties. The properties panel uses the same editors as Entity Details, so the RenderProperty attributes you already use in your components work the same way in your services.
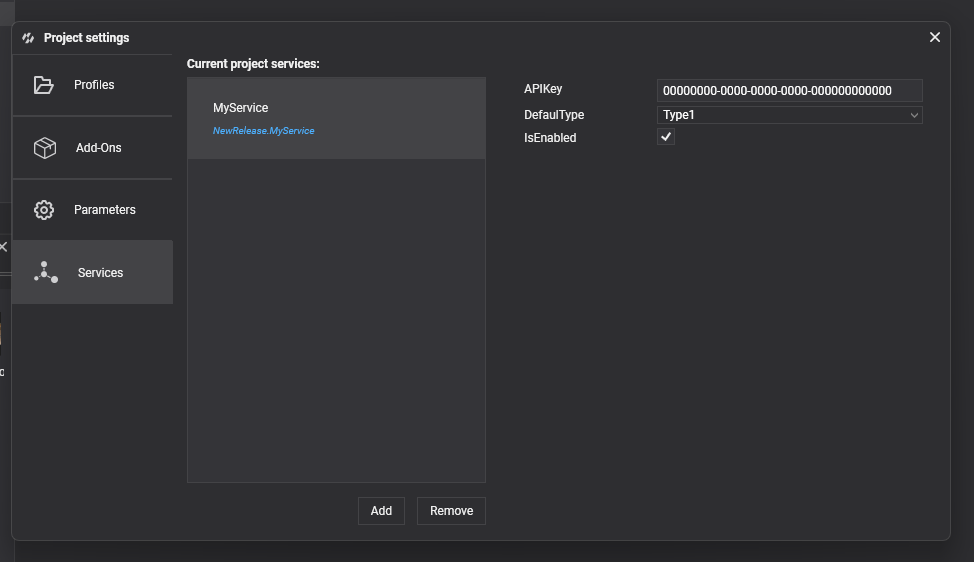
The configuration is saved with the project, and the services are registered when the application starts through generated code. If you already register a service of the same type in your Application class, your registration takes precedence, so existing projects keep working as before. Services meant for internal use can be hidden from the list with the [Discoverable(false)] attribute.
Projects build in less than half the time
We have also worked on the editor build times. Evergine Studio now builds your projects in less than half the time the previous version took. Since Studio builds a project when it opens it, you notice it every time you open one too.
We measured the times with two projects: an empty project and the vehicle physics sample.
| Project | Scenario | Previous version | New version | Reduction |
|---|---|---|---|---|
| Empty project | Clean build | 8.90 s | 3.73 s | 58% |
| Empty project | No changes | 8.13 s | 3.04 s | 63% |
| Empty project | C# change | 8.06 s | 3.06 s | 62% |
| VehiclePhysicsSample | Clean build | 10.19 s | 4.41 s | 57% |
| VehiclePhysicsSample | No changes | 9.49 s | 3.63 s | 62% |
| VehiclePhysicsSample | C# change | 9.42 s | 3.69 s | 61% |
The improvement comes from how the build is launched:
- Package restore, compilation and add-on discovery happen in a single MSBuild invocation, which also builds in parallel.
- The incremental build state is kept between builds.
- Only the files that changed are published.
Better asset management
Asset management has also changed a lot in this release, with easier and more intuitive ways to find assets and assign them to components and entities.
Asset drag and drop
Every asset picker now supports drag and drop: drag any asset from the Assets panel and drop it on the property that needs it in Entity Details. For example, a material on a MaterialComponent, a font on a 3D text or a sound on a SoundEmitter3D. You could already do this with the drop-down lists, but dragging is much more comfortable and faster. Asset viewers use the same property editors, so you can also drop a texture on a material in the material viewer and see the result right away.
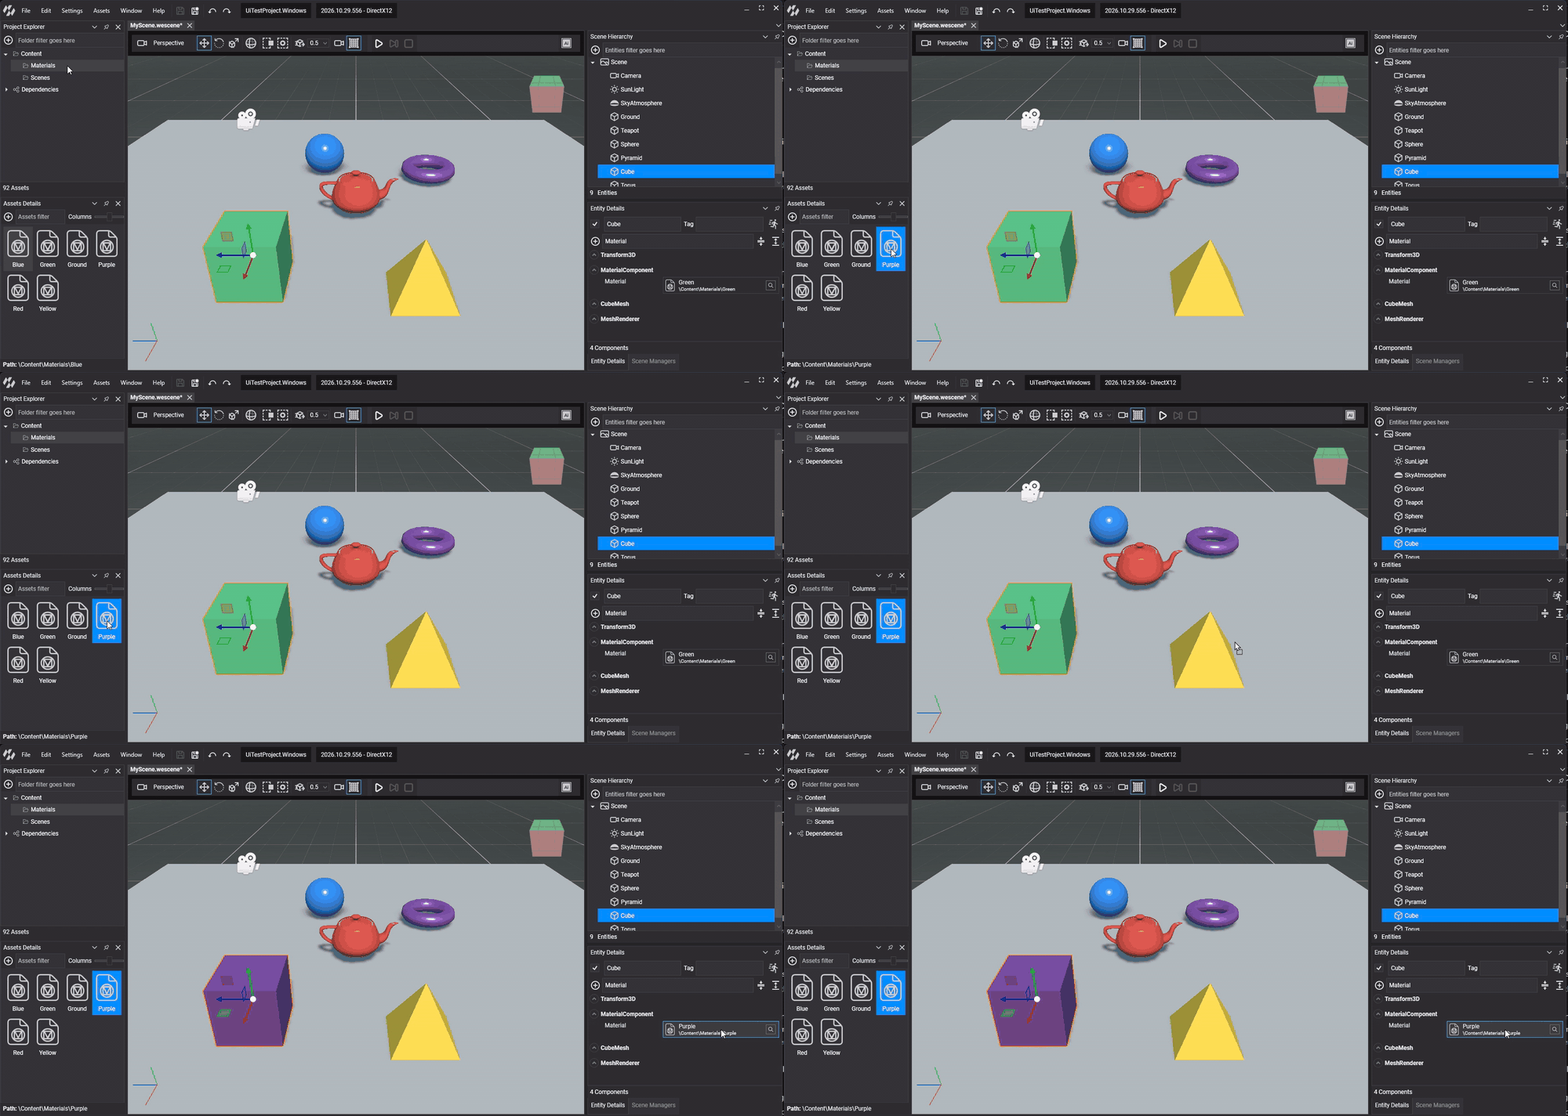
Organizing your content is easier too. The Project Explorer tree now supports dragging and dropping folders, several at once if you like, and you can drag assets onto a folder in the tree to move them.
Entity drag and drop
You can now also drag entities from the Scene Hierarchy panel onto the entity properties of components in Entity Details. It is especially useful when setting up physics scenes: the Connected Body property of constraints, which links one body to another, is set by dragging the other entity onto it. If you prefer, the picker also lets you search for the entity by name.
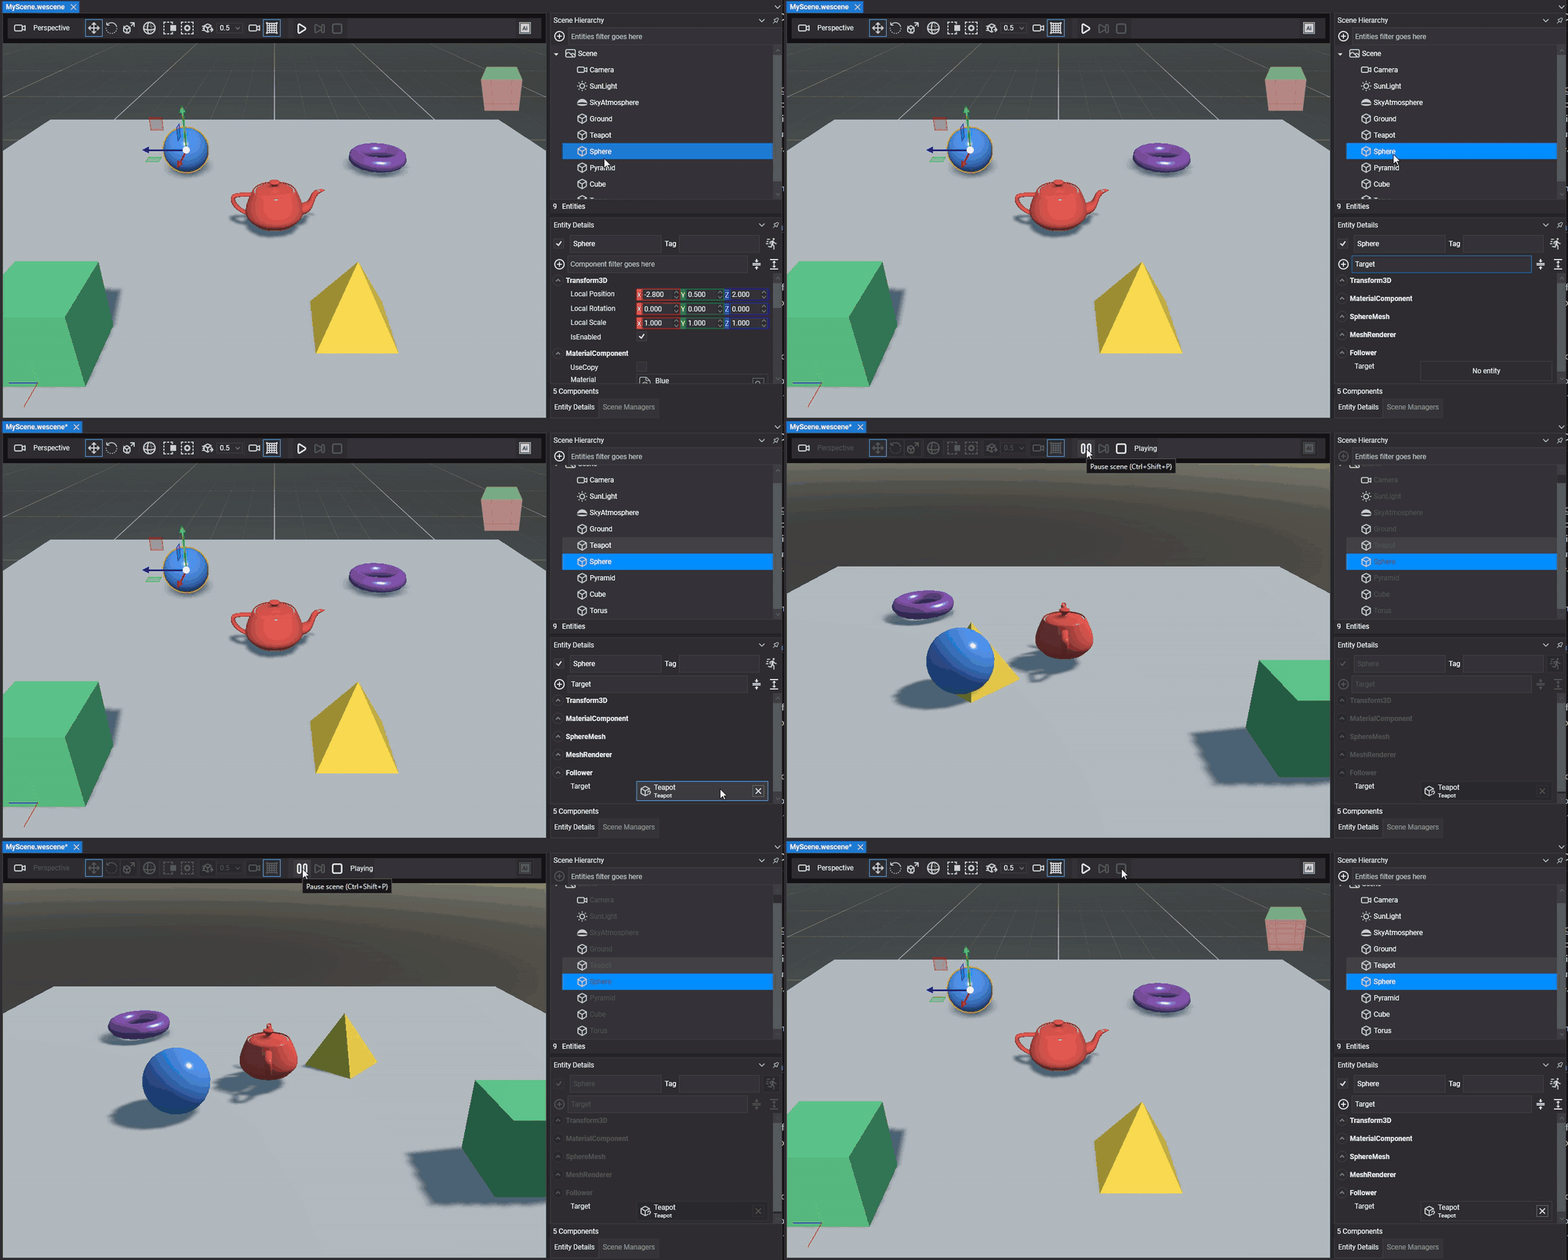
Your own components can use it with a property of type Entity. The RenderPropertyAsEntity attribute limits the accepted entities to those that have certain components:
public class Follower : Behavior
{
    // Only accepts entities with a Transform3D component
    [RenderPropertyAsEntity(typeof(Transform3D))]
    public Entity Target { get; set; }
}
References are saved by id and resolved when the scene loads. When you instantiate a prefab, or duplicate or paste entities, they are remapped automatically so the copies point to the copied entities and not to the originals.
Raw assets through AssetsService
To load and handle assets from code, Evergine has always used AssetsService, which brings together everything related to assets. Now, besides the recognized asset types, it can also load raw assets: files in formats Evergine does not recognize, such as a JSON configuration file, a CSV with data or a format of your own. The new LoadRaw<T> method gives you a stream of the file and you decide how to read it, so you get all the flexibility you need. You also load supported and raw assets the same way, something you used to handle separately by building the file path by hand.
protected override void CreateScene()
{
    var assetsService = Application.Current.Container.Resolve<AssetsService>();

    var text = assetsService.LoadRaw<string>(EvergineContent.Raw.hello_txt, stream =>
    {
        using var reader = new StreamReader(stream);
        return reader.ReadToEnd();
    });

    var textComponent = this.Managers.EntityManager.FindFirstComponentOfType<Text3DMesh>();
    textComponent.Text = text;
}
The asset id comes from the generated EvergineContent class, like any other asset. The result is not cached: every call reads the file again, so keep it if you need it more than once.
General improvements
Finally, a few smaller improvements to the Evergine Studio interface. They are less eye-catching, but they also add a lot to the better user experience the Evergine team has been working towards in this release.
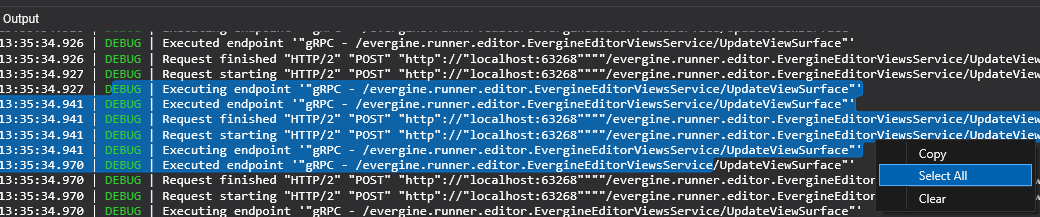
An Output panel you can copy from
We have rewritten the Output panel, where the editor logs everything it does. It used to show each message as an item in a list, and copying several lines was almost impossible. Now you can select text directly, or right-click and use Select All, to copy it or analyze it with an external tool. This makes debugging and reporting issues easier.
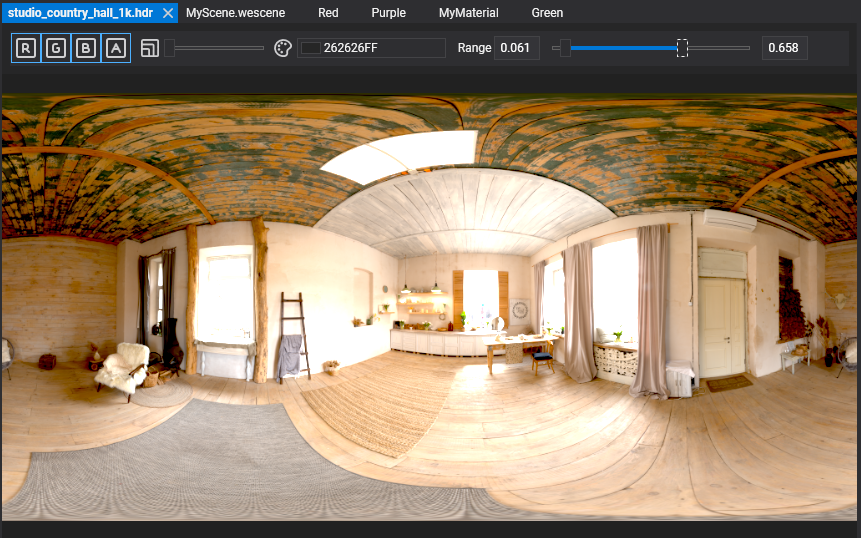
HDR range in the Texture Viewer
The texture viewer has a new range control to move through the values of HDR textures, which go well beyond 1. Adjust the range to see details that only show up in a specific band, such as the brightest or darkest areas of an environment map.
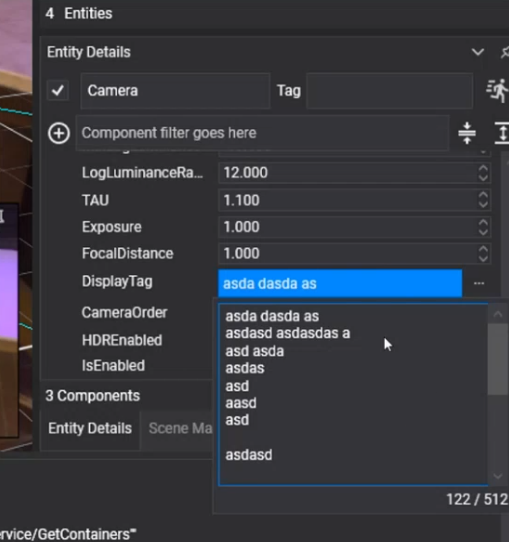
Multiline string properties
You can now edit multiline strings from the editor. Just add the RenderPropertyAsTextBox attribute to the property of your component, behavior or drawable:
[RenderPropertyAsTextBox(multiline: true, maxLength: 512, placeholder: "Custom text")]
public string DisplayTag { get; set; }
In Evergine Studio the property shows up as a multiline field, with a placeholder when it is empty and a character counter that enforces the maximum length.
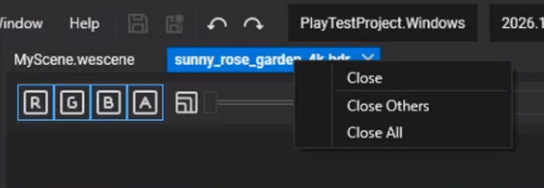
Close all tabs
Right-clicking a document tab shows Close, Close Others and Close All. As in Visual Studio, they work per window: closing everything in a floating window does not close the documents in the main window.
Reset profile values
Each profile (Windows, Android, Web…) can override texture settings and shader directives. Until now, once you changed one of those values there was no easy way back. Profiles now have a button to reset the original values with a single click.
And also
- DirectX12 is the default graphics backend. Evergine Studio starts with DirectX12 and new projects use Windows (DirectX12) as their platform. Existing installations switch to DirectX12 when they update, unless you chose Vulkan explicitly. DirectX11 is still available as an optional platform.
- Tripo AI on API v3. Tripo is retiring its v2 API, so the Evergine Studio integration already uses v3.
- Launcher. You can uninstall several Evergine versions at once, which is handy if you often try nightly and preview builds, and the Launcher reports its progress better while it loads.
Try it now
All these improvements are available in the new Evergine release. Update from the Evergine Launcher, open your project and try Play Mode, the new selection and the manipulators. If you find any issue or have ideas to improve Evergine Studio, let us know in our GitHub repository.