Morphing animation system
Introduction
In this new release Evergine has added support for morphing animation in its model assets. It also uses Compute Shaders in the supported rendering platforms. This proved to be 4 times faster than CPU morphing, due to the amazing parallel performance.
Understanding morphing animation
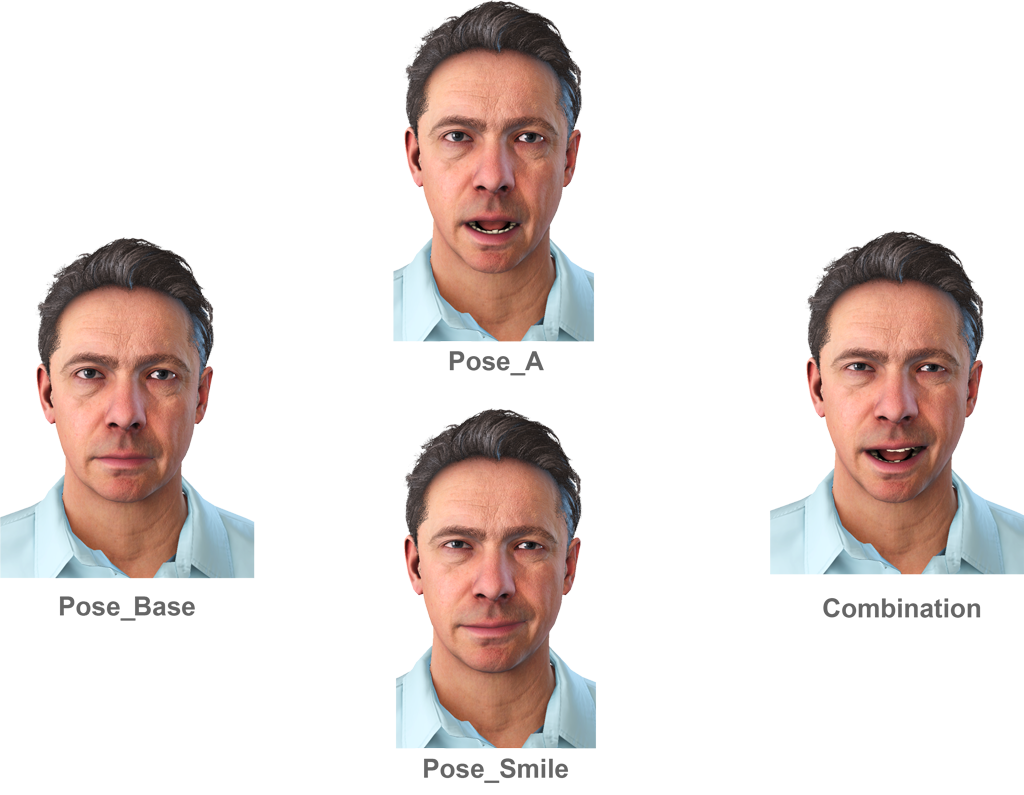
Morphing animation is based in Morph Targets, also known as blend shapes or shape keys. They are a technique used in 3D computer graphics to create realistic facial expressions and animations. These are essentially a series of pre-defined 3D models that represent different facial or body expressions. Each morph target defines its vertex displacements respect the base pose (usually a neutral pose). This allows combining multiple expressions, each one with a different weight, so a character’s face or body can transition smoothly from one shape to another. This interpolation process enables intricate and lifelike movements, making morph targets a valuable tool for character animation.

Compute shader
Using morphing via compute shaders instead of the CPU takes advantage of the highly GPU parallel processing and scalability. It also helps reducing CPU load. However, Evergine automatically switches to CPU mode when the rendering API of the app does not support compute shaders or when the application forces to use CPU (disabling the UseComputeSkinning property).
Using morph targets in Evergine Studio.
Import your 3d model.
Import your 3d model. Before you can use morph targets, you need a 3D model with morph targets. Import your 3D model into Evergine as usual, dragging and dropping it into your desired folder. For now, morph targets are supported in GLTF, FBX and Collada files.
Open your 3D model.
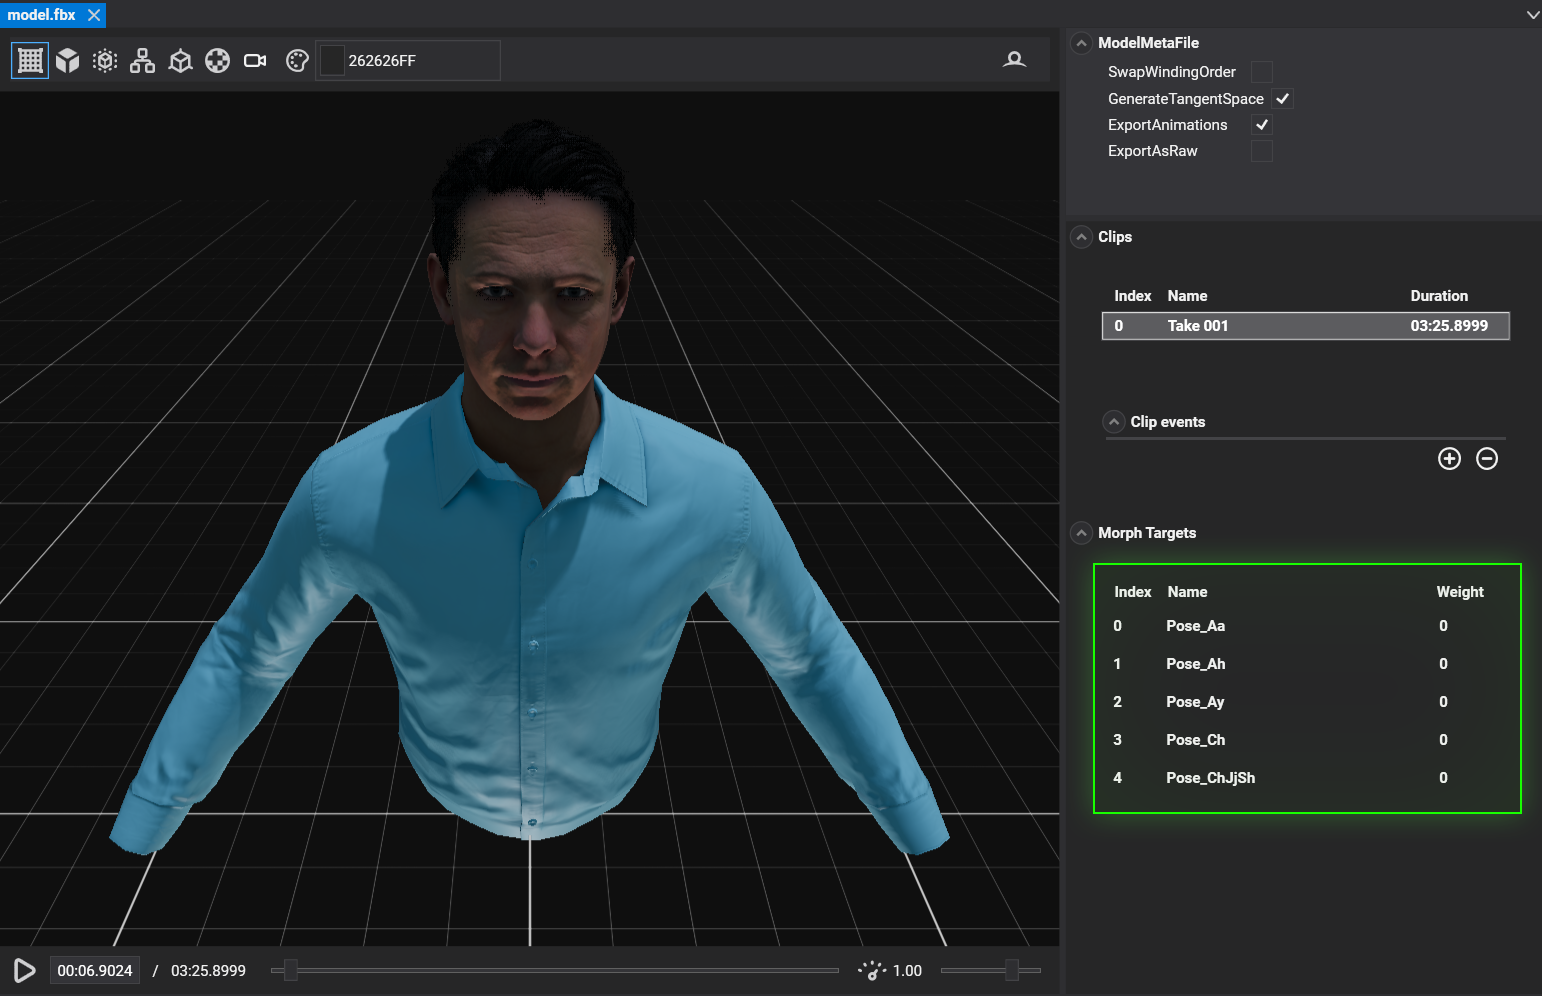
Open your imported 3d model to open its Model Viewer. If your asset has morph targets, they will be listed in the Morph Targets panel on the right side. It also shows the default weight of each pose.

Edit the poses in your scene.
If you instantiate the model in your scene (dragging and dropping into the scene viewer). It will create the usual model hierarchy of entities. If you select an entity with morph targets, you will see a new panel in then SkinnedMeshRenderer component. That panel allows you to control all the morph targets directly into the editor.
Search the pose you like to modify and adjust its slider.
This will save the weights of all the morph targets of the model.
Using morph targets from code.
In your C# Evergine project, you can control the morphing of a mesh by controlling its morph target weights, like the previous section. You can modify them in the SkinnedMeshRenderer component, using the following property:
- float[] MorphTargetWeights. If this property is null or emptymeans the mesh doesn’t have any morph targets. Otherwise, that array will have one float value per morph target. Their order is the same of the one saw in the Model Viewer and SkinnedMeshRenderer editor panel.


